type="html">
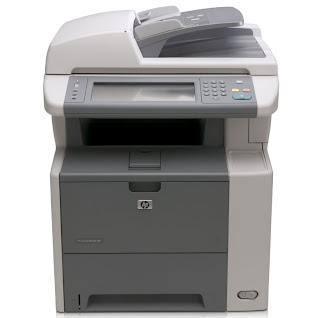
Hewlett Packard's LaserJet M3035 printer is a multi-function device combining black and white laser printing capability. It has two built-in paper trays, both of which can hold most major paper sizes, including letter, legal and A4 size. The only change that is possible with the M3035's trays is to add an additional 500-sheet accessory tray.
1). Switch off your HP LaserJet M3035 printer by flipping its power switch to the "O" position.
2). Place the additional paper tray on a surface, facing up.
3). Lift the printer and lower it down onto the tray. The tray is the same size as the printer, so it should sit directly under the printer taking up the same footprint as the printer. Ensure that the two pieces in the front of the tray's top panel and the piece in the back of its top panel fit into the corresponding slots on the printer.
4). Pull the paper drawer out of the paper tray by simply sliding it forward and, if necessary, lifting slightly upwards.
5). Remove the packing materials and packing tape from the inside of the accessory paper tray. Expect to find a number of pieces of tape, some of which will be securing Styrofoam blocks.
6). Adjust the blue paper alignment guides by squeezing the tabs and pushing outwards. Put paper in the tray, and then adjust the guides so that they are flush with it. Ensure that you do not fill the tray above its top line, denoted by a label with a dashed horizontal line below three downward-pointing triangles.
7). Reinsert the paper tray in the printer by pushing it in, first with a downward motion, and then by pushing it straight back.
8). Turn the printer on by flipping its power switch to the "On" position denoted by a single vertical line.
9). Print to the new tray by selecting "Tray 3" as the paper source in your software program's printer driver.


0 comments:
Post a Comment